NFTs 101 & How to make it
June 13, 2022
What is an NFT?
There are thousands of other people out there on what exactly they are I'll just keep it brief.
It is a token or in other words, a card sort of thing that links to a piece of data. That could mean information, images, videos or gifs. Each NFT you have has a unique identifier on the blockchain. Sort of like your social insurance number and how the government identifies you.
This unique identifier makes you eligible for the perks that some NFTs offer. For example, VeeFriends, a profile pic collection from Gary Vaynerchuk makes you eligible for 4 tickets to his three-year conference named VeeCon happening all around the world. That’s why it’s called “Non-Fungible” meaning it cannot be multiplied or copied.
This phenomenon of digital assets that could be worth something and not be replicated makes people go crazy on Twitter. Its potential ability to transform various traditional industries such as gaming, art and music make this technology here to stay.
Hope that makes sense. If not conduct further self-directed research.
In this unit, we will be learning to start and finish the process of creating, minting your custom NFT, and publishing it to the OpenSea marketplace. Keep in mind we will be testing our tokens on the Rinkeby testnet, which is free of charge but if you would like to really sell your NFT or art select Ethereum Mainnet when we get to that portion of the tutorial. Keep in mind “minting” or in other words publishing to the chain would incur charges of $10–15 USD based upon gas prices (the cost of completing any transaction on the blockchain).
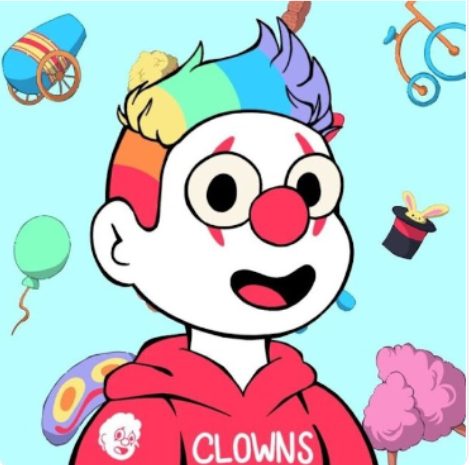
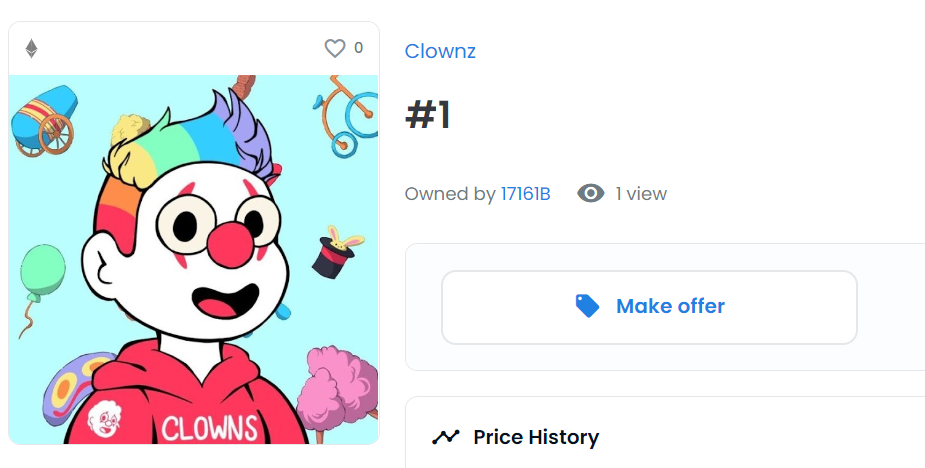
Let’s get started by selecting what the presentation image of our NFT would be. This could be an image or illustration of someone or something that you would like to make non-fungible. In my case, I will be minting a picture of my new collection Circus Clownz.
Once you’ve selected that we will be creating metadata for that image.
Metadata
What is metadata?
Simply put, Metadata is data that provides information about other data. In the context of NFTs, metadata might include information such as the creator of the NFT, when it was created, and the qualities of the NFT. For example this NFT I own named “World of Women Galaxy” has properties of all 21,000 characters. Therefore increasing the rarity of some items.
(Example: https://opensea.io/assets/ethereum/0xf61f24c2d93bf2de187546b14425bf631f28d6dc/2243)
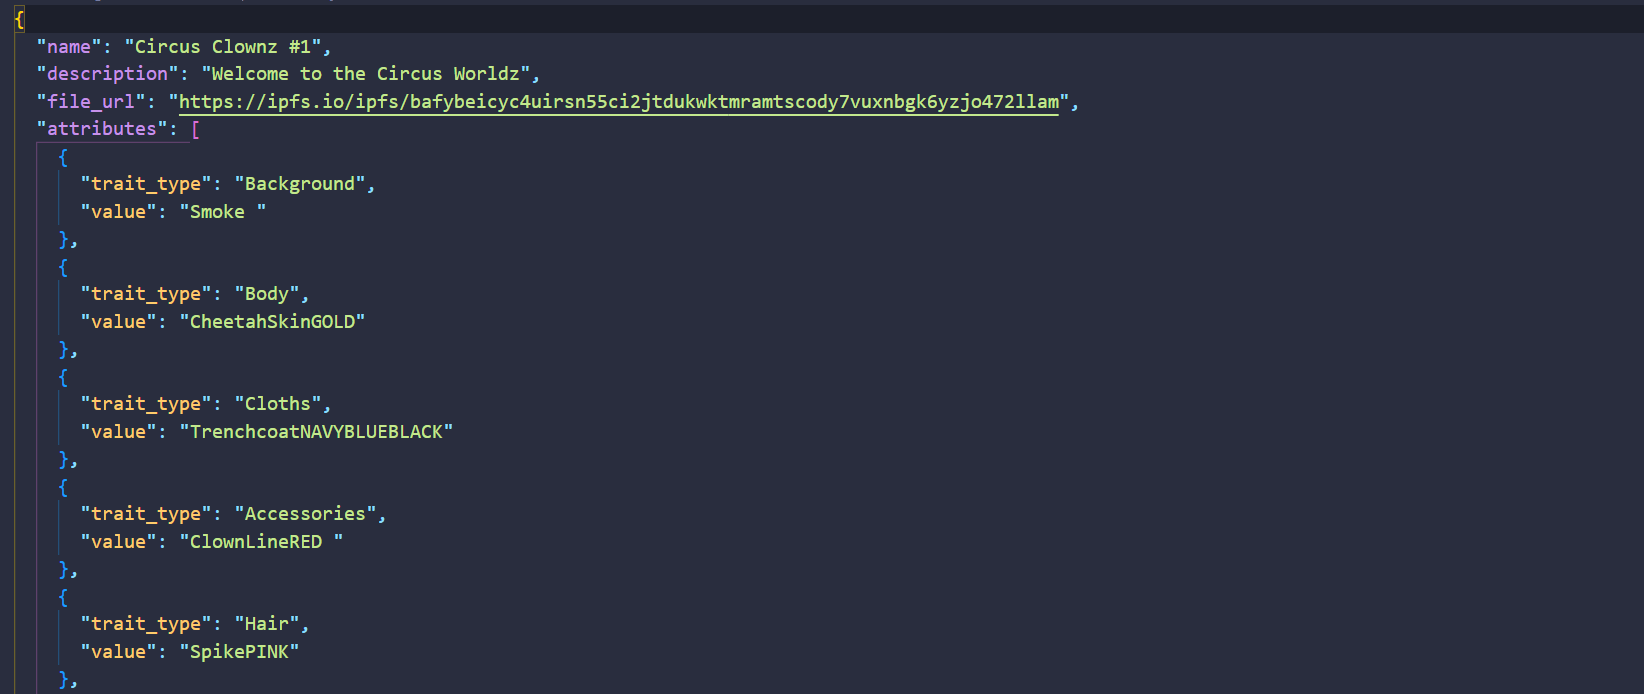
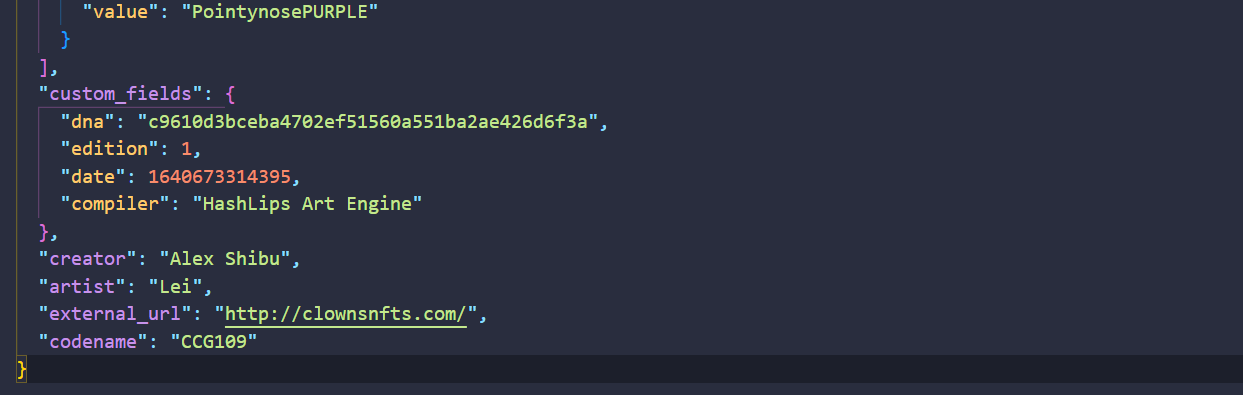
For us to set similar properties to our characters and images we will need to create our own metadata document for OpenSea to interpret. Create a new .json file document on your device or download this example and make changes by opening the file in either Visual Studio Code or notepad. The file structure you must follow looks something like the one below.
Begin with the name of the token then the description and for the file URL we will be getting back to this a bit later but for now, leave it blank. Finally for attributes follow the format below to add traits the value of these traits. Don’t forget to end with curly brackets. The rest of the portions are completely optional. Save the file as a .json and move on to step two.
IPFS
The next step in our NFT creation process is uploading our content files to IPFS and claiming our base_uri.
What is IPFS?
IPFS is a peer-to-peer network that enables people to store and share data in a decentralized way. IPFS is often used in conjunction with NFTs, as it can help to ensure that NFTs are stored securely and efficiently.
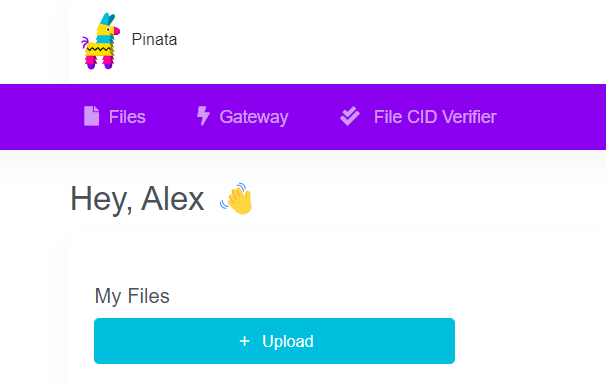
There are many decentralized storage solution providers but in our case, we will be using pinata.cloud. Sign in and create an account. Once you get to a screen similar to the one below you’re ready to move on to the next step.
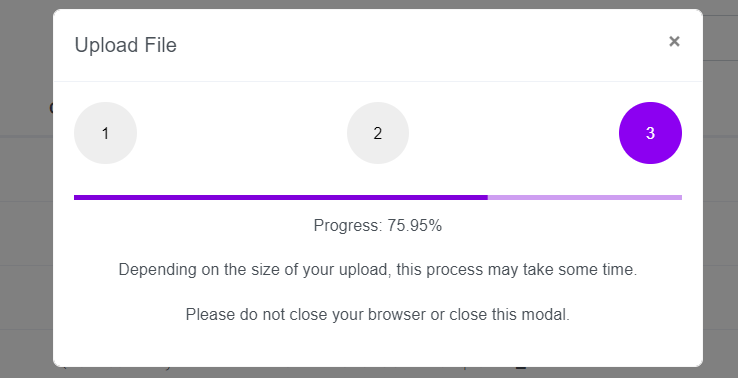
Select "upload" and continue with the image file you would like to turn into a NFT. It will take a few seconds to process but in the end, it will all be worth it.
Awesome work! You published your image to IPFS, but you are not quite done yet.

From the files section of your account copy the CID number to your metadata file. More specifically the file URL portion. The Content-ID number should only replace or come after the ipfs.io/ipfs/ portion. This is very important in terms of identifying your image.
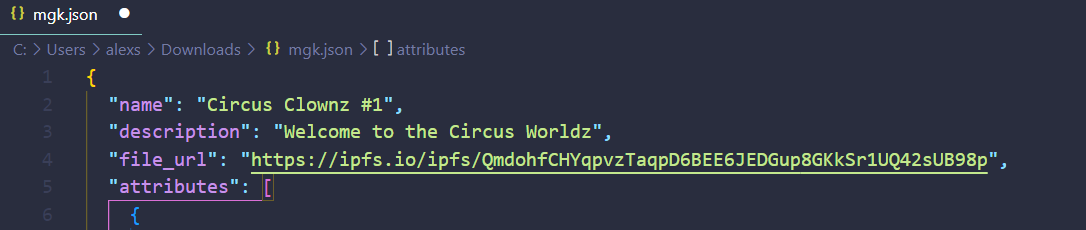
Once saving the .json file, upload that metadata file to InterPlanetary File System, similarly to the image from earlier. This should give you another content ID number. Note that ID down and let's move on to the last portion of the third portion of this unit where we explore and develop Ethereum smart contracts.
Smart Contract
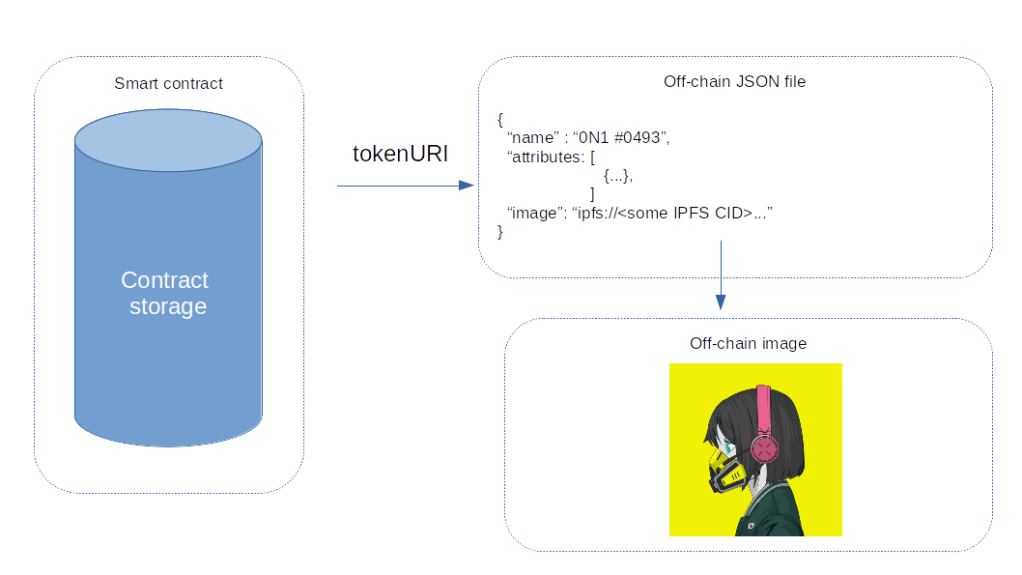
Now that files are both uploaded to NFT creation, we’re in the third part where we will be developing the smart contract to be published to the network. The smart contract calls the .json file that then calls the image to place on OpenSea as illustrated above.
What are Smart Contracts?
Smart contracts are digital contracts programmed in Solidity, which defines the conditions of an agreement between two parties. They can be used to automate transactions or to enforce agreements. In an NFT, a smart contract can be used to enforce the terms of the sale, such as specifying the price, the date of the sale, and the conditions under which the NFT can be transferred.
Let’s get started by setting up our local environment and hop into some code :)
Head over to Remix, our IDE for deploying the contract. Create a new .sol file in the contracts folder and call it whatever you would like. I’ll be calling mine “Clownz.sol”.
Now copy this file and put it into the main contract file we created. When saving that file using ctrl + s or cmd + s, you’ll see a lot of artifacts and dependencies get created automatically.
There is not a lot of programming you need to understand but here is a basic run through of the important thing you should know.
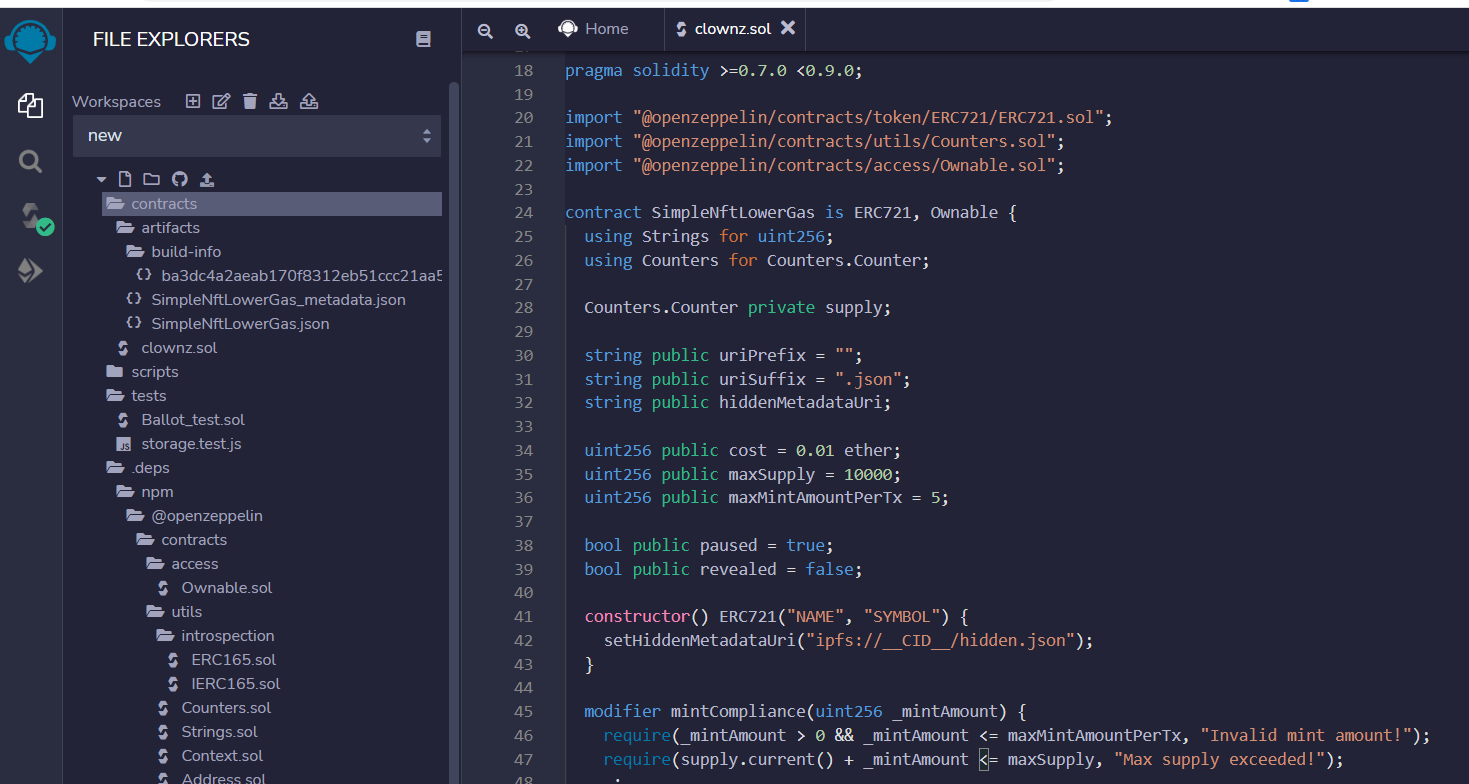
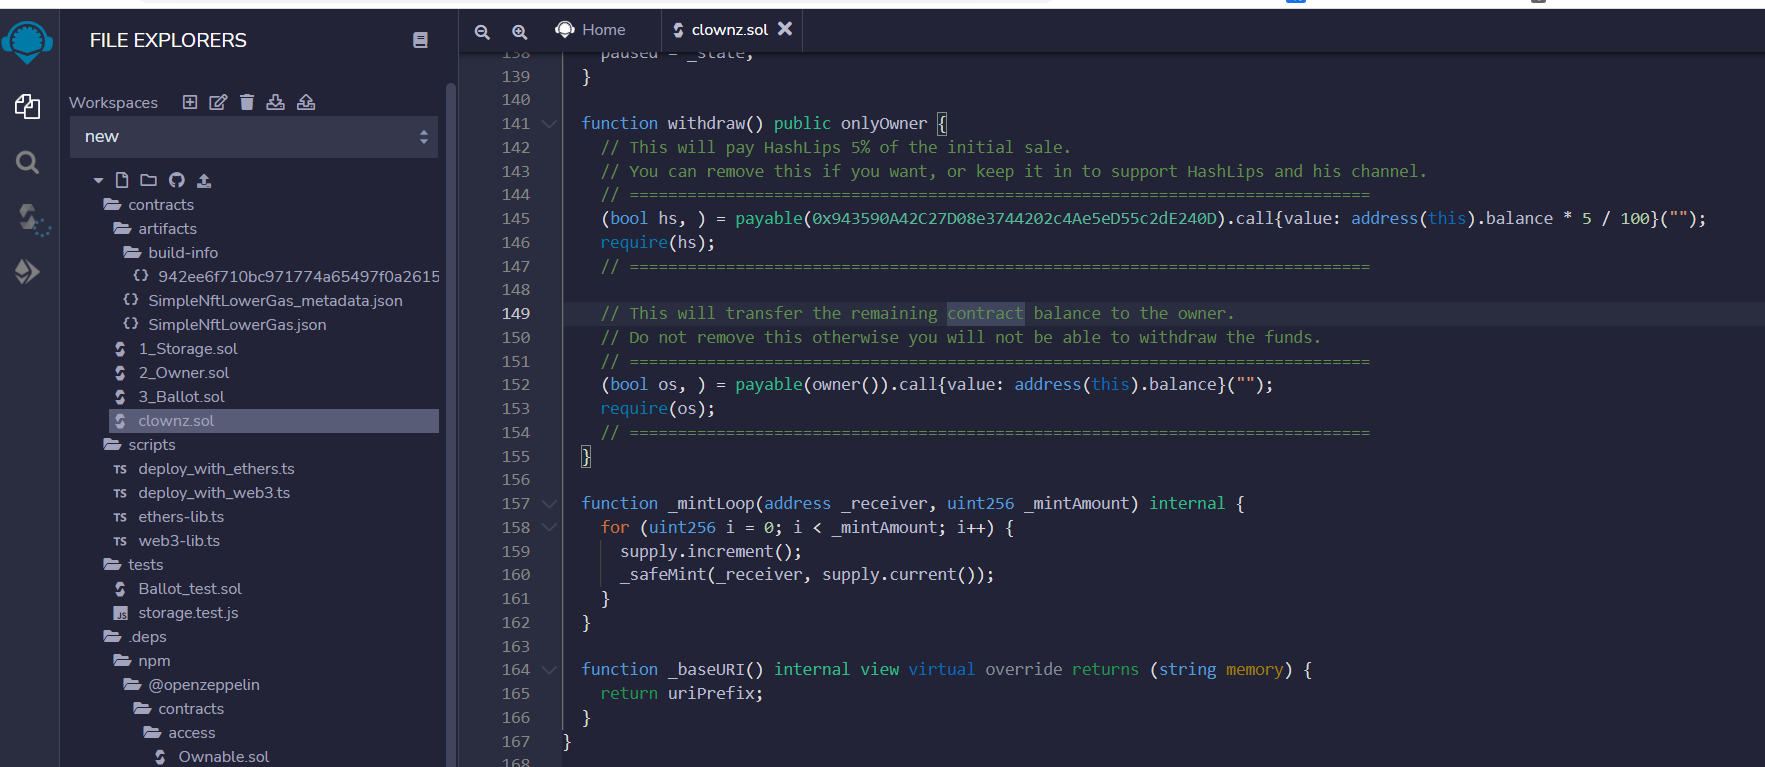
This is the contract importing the important OpenZeppelin library to get the contract working on the blockchain.
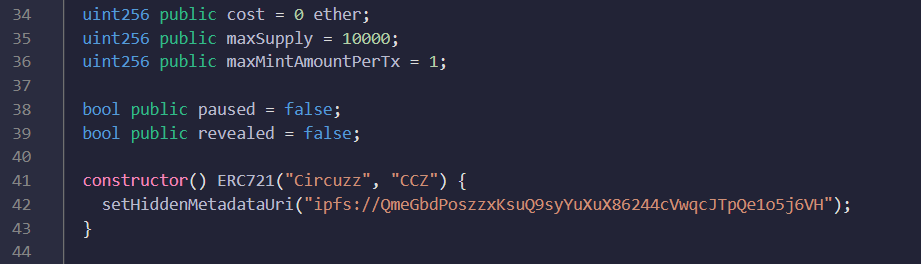
In this portion, we set the cost of the NFTs for others to purchase alongside the total supply since we’re simply making 1 we don’t have to change anything except the price set to 0. For maxmint put 1 instead so we avoid access errors and for pause set it to false. We want the official image to be the one OpenSea looks at first. In the constructor area, we set the name of the contract and symbol, it’s totally up to you. Get creative! Finally, add the CID number of the .json file to the hiddenmetadatauri. At the end, it should look like the image above. Don’t forget to remove the .json from the line.

This is the function in which the user is able to mint the NFT only if one has sufficient funds in their wallet.
Great Job! You are now ready to deploy. But before that, we need to get you a wallet and some eth in it.
Deploy
Head over to MetaMask to download the chrome extension. This will act as your digital wallet for years to come.
What is a digital wallet?
A digital wallet is a software program that stores your private keys and public addresses and allows you to send and receive digital currency. MetaMask is a digital wallet that allows you to hold Ether and other ERC20 tokens such as NFTs.
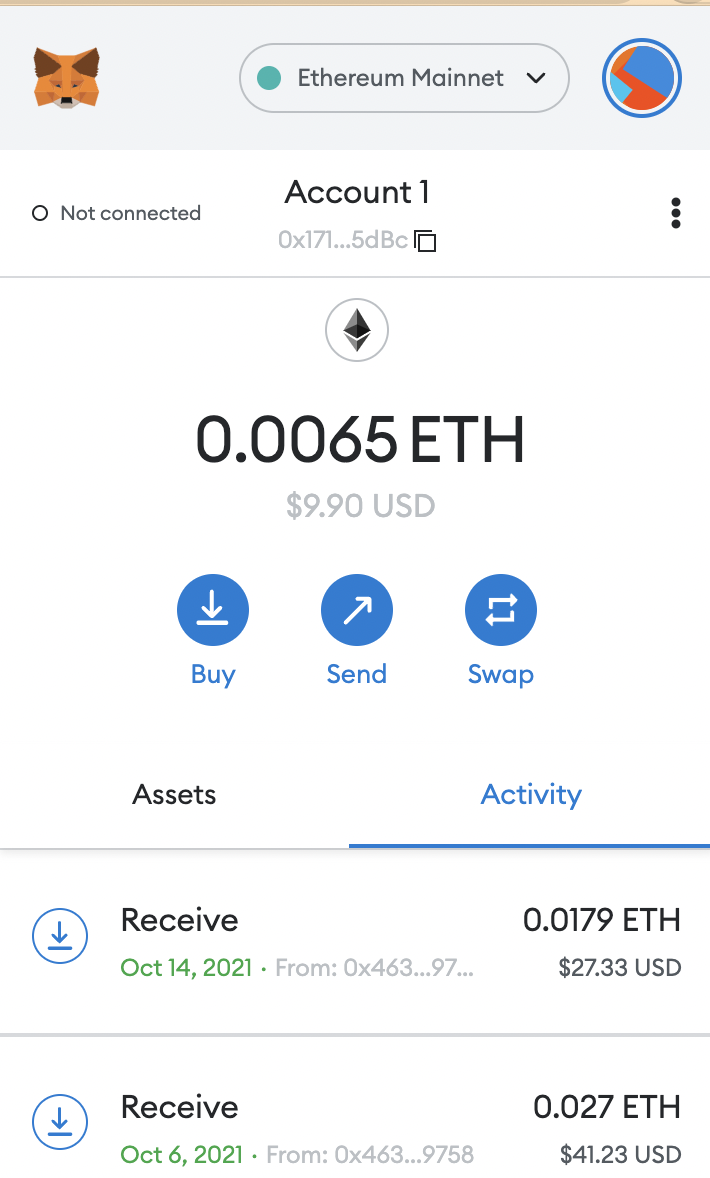
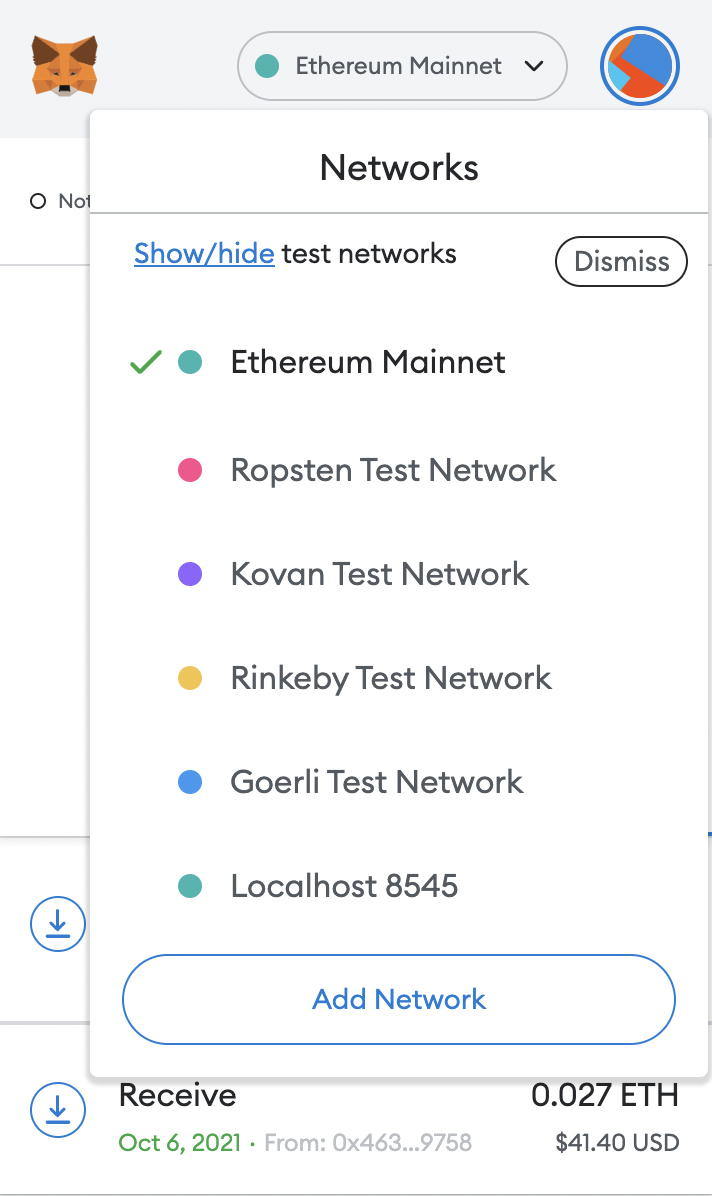
When first opening your MetaMask wallet it should look something similar to this but have a balance of 0.00. Switch over the Rinkeby testnet by clicking the drop-down menu near Ethereum Mainnet and select Rinkeby Test Network.
The next step is to add some eth into our wallets. Check out any of these websites to add some fake eth to our wallets. You would need at least 0.01 before moving on to the next step. If none of these work tweet at people with the #Rinkeby people are usually nice.
- MyCrypto faucet: https://app.mycrypto.com/faucet
- Official Rinkeby: https://faucet.rinkeby.io/
- Chainlink faucet: https://faucets.chain.link/rinkeby
With some eth now in your wallet you’re ready to deploy your smart contract to the blockchain.
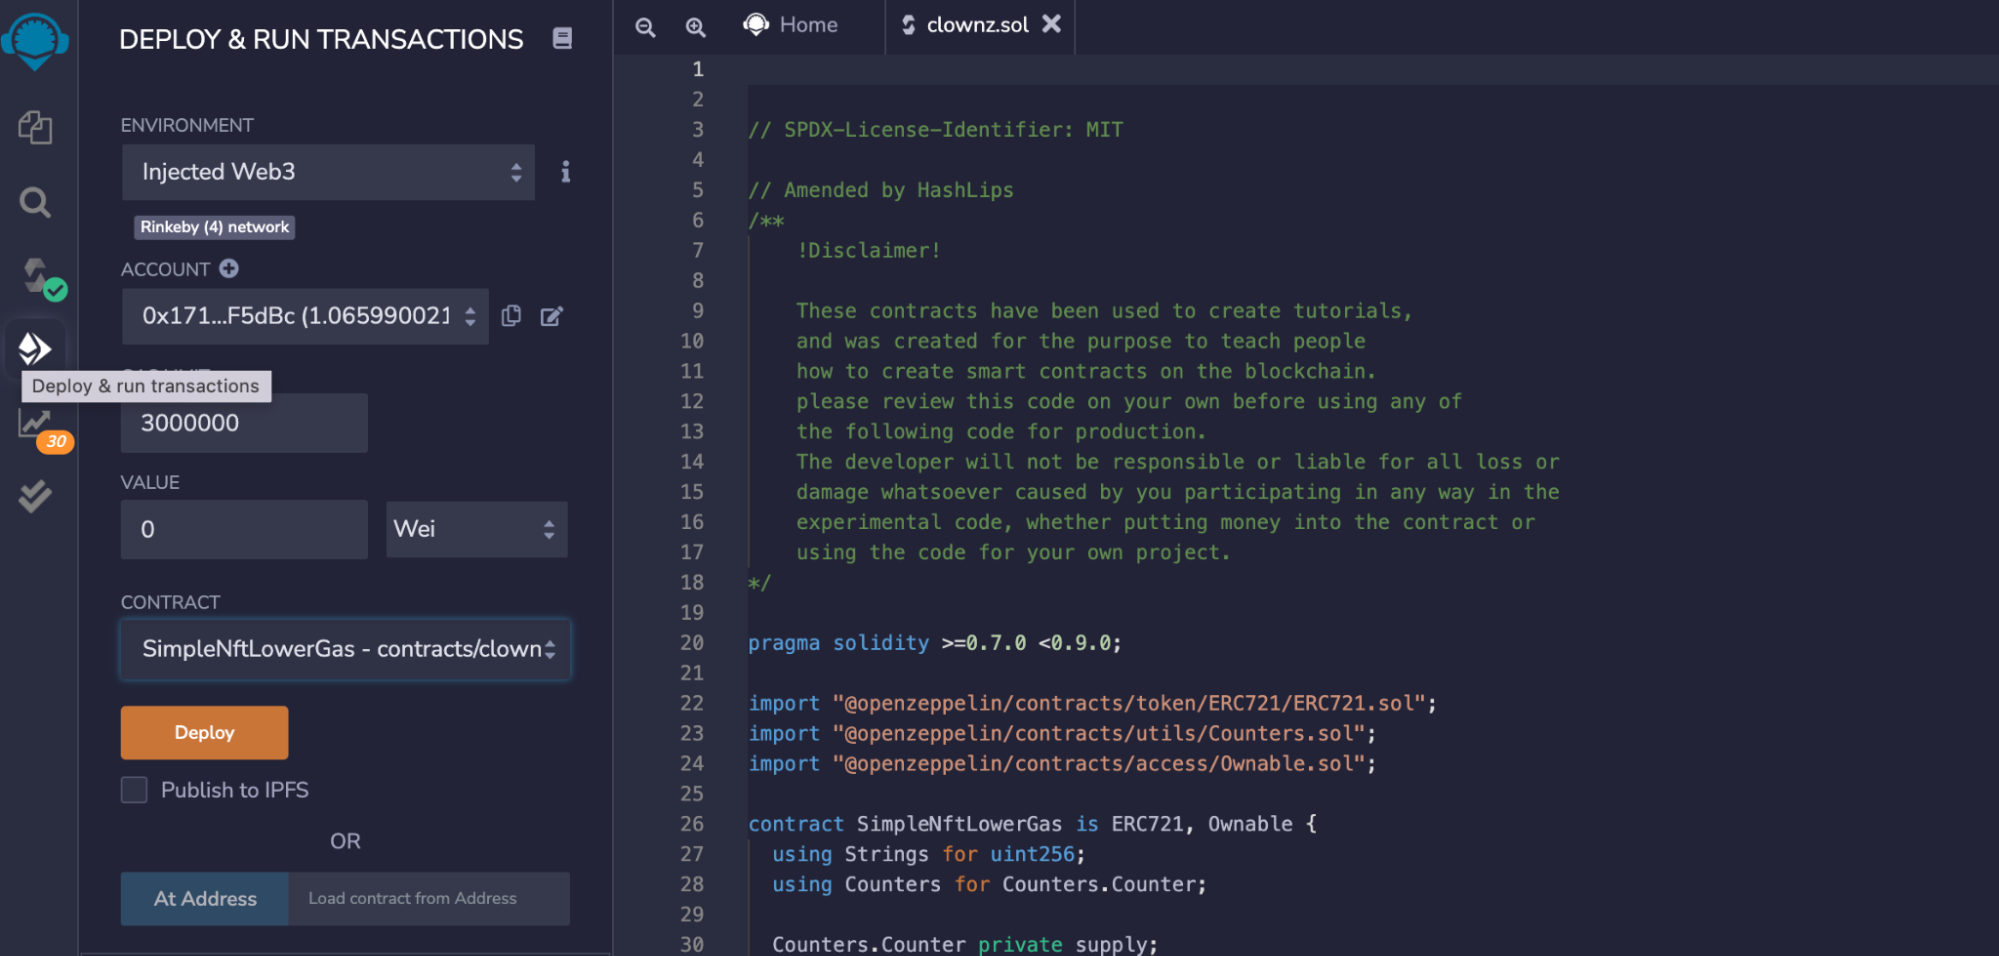
Going back into remix.ethereum.org, let’s head over to the deploy tab and then select a few options. In the environment dropdown select Injected Web3, account address would be automatic — if not please ensure you’ve selected the Rinkeby network on your MetaMask account. Next in Contract select your main contract. That for me would be clownz.sol. This is also the portion where you can choose using your wallet to either use the Rinkeby or the Ethereum Mainnet. While keeping in mind the Mainnet will incur real-world fees. Select Deploy and approve the transaction.

Congrats! You’ve deployed your first smart contract. Very exciting!
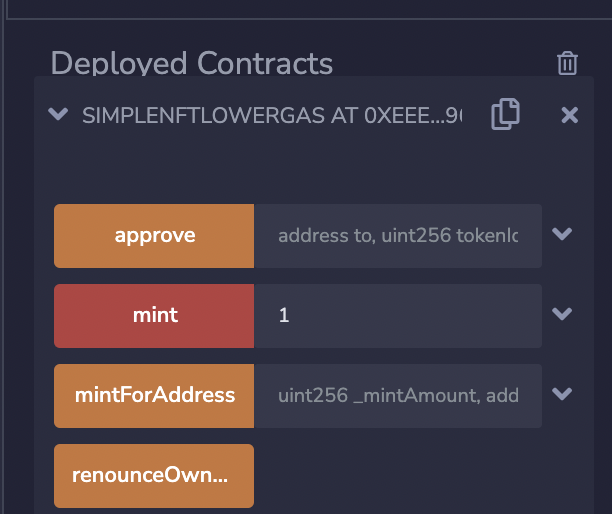
Now that you’ve deployed your contract let’s mint our first NFT! Open the drop-down from the Deployed Contracts menu and enter in 1 into the mint, and prove the transaction. You’ve done it! You’ve created your first Non-Fungible Token!
Now let’s go see it. Copy the contract address from the left corner and head over to testnets.opensea.io and paste it into the URL in the format https://testnets.opensea.io/assets/rinkeby/<contract-address>/<token-id> — for example:
https://testnets.opensea.io/assets/rinkeby/0xc3fcb878717c8b8b9b6add9de9cfcdc7170fdbd9/1
😍 You've done it
Great work! In this unit, you’ve learned web3 and NFTs, uploaded content to decentralized storage, written a smart contract, and finally deployed to the blockchain to create your own NFT. Pretty big deal! 🚀
Taking your project further!
What you learned in this project is simply the beginning! There is so much more you can do with NFTs and smart contracts, conduct future research to examine the tons of cool things you can do with your superpower ✨